Greetings, fellow swimmers and aspiring aquatic athletes! Today, we’ll explore the wonders of kicking drills for swimming. Whether you are a beginner swimmer or a seasoned competitor, these drills are the secret sauce that elevates your swimming and improves your technique! Let’s dive in and discover how these drills can be a game-changer for your performance.
Why Are Kicking Drills for Swimming So Important?
Kicking is a vital part of swimming, whether you’re gliding through freestyle, backstroke, or butterfly. It provides the force that propels you through the water, offering speed, stability, and impeccable technique.
Without a strong and efficient kick, you might find yourself struggling to keep up, gasping for breath, and feeling a bit out of your element in the pool. But with the right kicking drills, you can improve your kick and unlock your true power.
Unleashing the Power of Improved Kicking Technique
The impact of improved kicking technique on your swimming performance cannot be overstated. By honing your kick, you’ll improve your swimming by increased propulsion, enhanced body position, and a more streamlined form. This leads to less drag and a smoother, faster swim. Whether you’re competing or swimming for leisure, honing your kick technique could make all the difference.
In this article, I’ve handpicked some of the best kicking drills to transform your kick into a force to be reckoned with. Each drill comes with unique benefits that’ll help you improve your swim kick and take your swimming to the next level.
1. Single Leg Kicking Drill
Picture this: you’re in the water, hands gripping the pool wall, and legs ready to go. But here’s the kicker – we’re going to focus on one leg at a time! The single-leg kick drill is all about kicking with one leg while keeping the other extended straight behind you.
- Position Yourself: Stand in chest-deep water near the pool wall, facing the wall. Hold onto the edge of the pool with both hands for support.
- Engage Your Core: Engage your core muscles to maintain stability and balance in the water.
- Select a Leg: Decide which leg you want to start with – left or right.
- Kick with One Leg: Lift the leg you’ve chosen to start with, extending it straight behind you. Keep your toes pointed.
- Flutter Kick: Now, start kicking with the leg that’s still in the water, using flutter kicks. Your toes should point away from the wall.
- Maintain Steady Kicking Rhythm: Focus on keeping a steady and rhythmic kick with the leg in the water. The motion should come from your hip and engage your entire leg.
- Hold the Extended Leg Steady: Keep the leg that’s extended behind you steady and in line with your body. Avoid letting it drift or swing to the side.
- Switch Legs: After a designated number of kicks (e.g., 10-15 kicks), switch legs. Lower the active leg and lift the other leg to start the kicking motion.
- Alternate Legs: Continue to alternate between legs throughout the drill. Remember to keep your core engaged and maintain a streamlined body position.
Benefits of the Drill
- Improving Leg Strength: Kicking with just one leg means that the other leg has to work extra hard to maintain balance and keep you moving. This builds serious strength in your legs, making you feel like you’ve got rockets strapped to your feet the next time you kick with both legs.
- Finding Your Inner Equilibrium: Balancing on one leg is a bit like walking a tightrope – you’ve got to find your center of gravity and keep it there. This drill teaches you how to maintain stability in the water, which translates to a more balanced and powerful kick overall.
2. Vertical Free Kicking Drill
The Vertical Free Kicking drill focuses on kicking like a dolphin in the water but without the luxury of arms to support you. You’ll be floating vertically, with only your head above the water’s surface, channeling your inner aquatic acrobat!
- Position Yourself: Head to the deeper end of the pool, where you can’t touch the bottom. Position your body vertically in the water, with your head and face above the surface.
- Tread Water: Start treading water with your arms by your sides or crossed over your chest. This is to ensure you maintain an upright position in the water.
- Engage Your Core: Engage your core muscles to keep your body stable and your legs in an upright position.
- Begin Kicking: Now, start flutter-kicking with your legs. Your toes should be pointed, and the motion should come from your hips and legs, not just your knees or ankles.
- Kick with Power: Focus on kicking with power and intensity to keep yourself afloat. Your legs should be generating enough force to lift your body vertically in the water.
- Control the Kick: Keep your kicks controlled and consistent, avoiding any wild movements that might disrupt your balance.
- Maintain Head Position: Keep your head above the water throughout the drill. This will challenge your leg muscles to work harder without the support of your arms.
- Time Yourself: Aim to kick vertically for 30 seconds to 1 minute initially, and gradually increase the duration as you become more comfortable with the drill.
- Rest and Repeat: Take a short rest between repetitions and perform multiple sets of vertical free kicking during your workout.
Benefits of the Drill
- Enhancing Kick Power: When you’re kicking in a vertical position, there’s no wall or kickboard to rely on – it’s just you and your legs. This forces your legs to work extra hard to keep you afloat, building tremendous power that’ll leave your regular kicks feeling like child’s play.
- Efficiency, Ahoy! Kicking vertically demands precision and control. You’ll have to find that sweet spot where your kicks are just right – not too big, not too small – to keep you buoyant without wasting energy. This focus on efficiency will carry over to your horizontal kicks, making them more streamlined and effective.
3. Mail-Slot Kick Drill
It’s time to tackle the Mail-Slot Kick Drill – a little-known gem that’ll make you feel like the swimming equivalent of a streamlined torpedo. During this drill, you’ll emphasize a narrow and efficient kick motion, as if you’re sliding through a mail slot (but a watery one, of course!).
- Position Yourself: Start by standing in the water, ensuring it’s deep enough that you can comfortably perform the drill without touching the bottom.
- Body Alignment: Position your body horizontally with your face in the water, looking at the bottom of the pool and arms fully extended. Your body should be in a streamlined position.
- Narrow Kick Emphasis: Now, begin kicking from your hips with a narrow and focused motion. Picture your feet passing through a narrow mail slot with each kick.
- Keep It Controlled: It’s essential to maintain control over your kicks. Avoid big, splashing movements and focus on precise, narrow kicks that minimize resistance.
- Flutter Those Toes: Keep your toes pointed throughout the drill. This will create a more streamlined shape and contribute to a more effective kick.
- Engage Core Muscles: Engage your core muscles to stabilize your body and improve balance as you perform the mail-slot kicks.
- Coordinate with Breathing: Coordinate your breathing with the kick. Take a breath when needed, but aim to keep your face in the water for as long as possible to maximize efficiency.
- Swim Gently: To practice continuous motion, swim gently forward while maintaining the mail-slot kick motion. Focus on maintaining a smooth and consistent kick as you move through the water.
- Time Yourself: Perform the mail-slot kick for 30 seconds to 1 minute initially, and gradually increase the duration as you become more proficient.
Benefits of the Drill
- Reduction in Drag: By focusing on a narrow kick that slices through the water, you’ll minimize resistance and drag, making it easier to move through the pool. Say goodbye to sluggishness and hello to swifter swimming!
- Efficiency in Motion: The mail-slot kick is all about making every movement count. No wasted effort, no flailing legs – just a precise and controlled kick that’ll have you gliding like a fish in no time.
4. Ankle Rotations
The key to a powerful kick lies in those often-neglected ankles! For the Ankle Rotations drill, imagine you’re an underwater ballerina gracefully performing circular motions with your ankles. Here’s how to give those ankles the TLC they deserve:
- Position Yourself: Begin by standing in waist-deep water or find a comfortable spot in the pool where you can easily perform the drill.
- Back Floating Position: Lie on your back with your arms at your sides and your legs fully extended. Allow your body to float naturally on the surface of the water.
- Point Your Toes: Point your toes away from you, engaging your feet and ankles.
- Rotate Your Ankles: Now, start rotating your ankles in circular motions. Imagine you’re drawing a tiny circle with your toes.
- Controlled Movements: Perform the ankle rotations with control and precision. Keep the movements steady and smooth throughout.
- Change Directions: After several rotations in one direction, switch to the other direction and continue the circular motions.
- Focus on Both Ankles: Remember to rotate both ankles equally, ensuring balanced development of ankle flexibility.
- Breathing and Relaxation: Keep your breathing relaxed and natural while performing the ankle rotations. Use this opportunity to enjoy the calming sensation of floating on your back in the water.
Benefits of the Drill
- Improved Ankle Flexibility: Ankle rotations work wonders for enhancing the range of motion in your ankles. This increased flexibility allows for a more efficient kick, where your feet can move through a greater arc and generate more propulsion.
- Stronger Kick Propulsion: Picture this: with flexible ankles, your kicks will transform into mini propellers, propelling you forward with each stroke like a rocket in the water. Whoosh!
So, don’t skip those ankle rotations in your warm-up routine. Embrace the circular grace and say hello to a more powerful and efficient kick!
5. Flutter Kicking Drills
Welcome to the heart of the kicking kingdom – Flutter Kick Drills! These drills are the holy grail for improving your freestyle swimming, swimming faster, and unlocking the true potential of your flutter kick. Get ready to kick it up a notch with these fantastic flutter-focused exercises:
Flutter Kicking at the Wall to Enhance Technique
- Approach the Wall: Stand facing the wall in the pool, with your feet shoulder-width apart and your hands gripping the edge of the pool.
- Body Position: Keep your body in a streamlined position, with your head aligned with your spine and your core engaged.
- Flutter Kick: Begin flutter kicking your heart out, maintaining a steady and rhythmic kick.
- Toes Pointed: Keep your toes pointed and your legs relatively straight throughout the kick.
- Focus on Technique: Embrace the wall as your support, allowing you to concentrate on perfecting your flutter kick technique.
Floating on the Side with Flutter Kicks for Body Alignment
- Floating Position: Begin by lying on the side of your body in the water, with one arm extended forward and the other resting along your body.
- Body Alignment: Engage your core muscles and start flutter kicking while keeping your body horizontal and in alignment with the surface of the water.
- Controlled Flutter Kick: Focus on maintaining a controlled and rhythmic flutter kick, with your toes pointed and legs relatively straight.
- Balance and Stability: This drill helps you work on your body balance and alignment, ensuring that your flutter kicks are as efficient as possible.
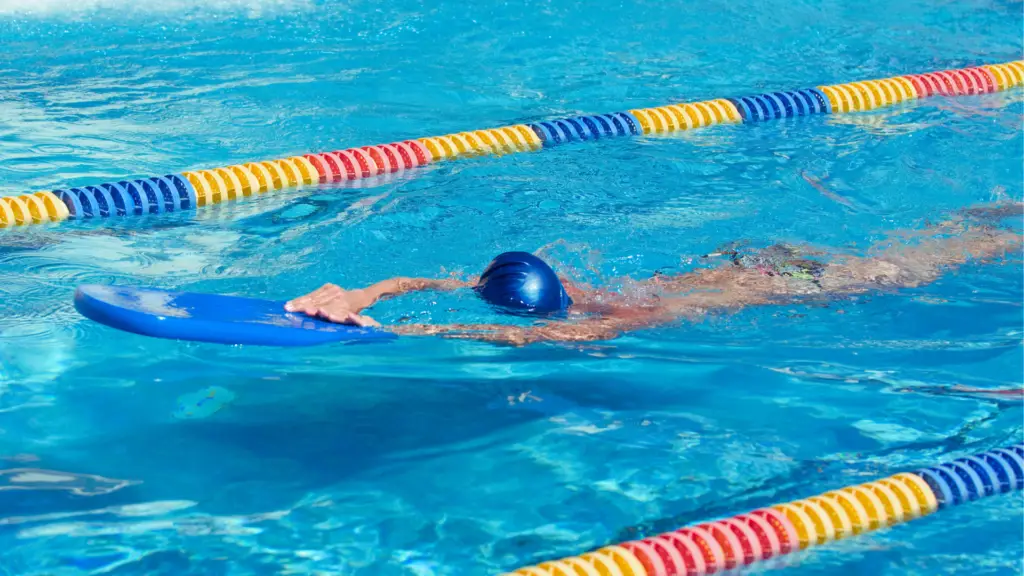
Using a Kickboard or Buoy for Support During Flutter Kicks
- Grab a Kickboard or Buoy: Get hold of a kickboard or buoy and hold it with both hands in front of you.
- Flutter Kick: Start flutter kicking while holding the kickboard or buoy for support.
- Engage Your Core: Engage your core muscles to maintain stability and control during the kick.
- Increased Resistance: This drill provides added resistance, which helps you focus on generating more power with your flutter kick.
Benefits of these Drills
- Enhanced Flutter Kick Efficiency: By diligently practicing these flutter kick drills, you’ll fine-tune your flutter kick, making it more efficient and effective at moving you through the water like a streamlined rocket.
- Increased Propulsion: Efficient flutter kicks equal more propulsion and speed in the water. Say hello to faster swimming and smoother strokes!
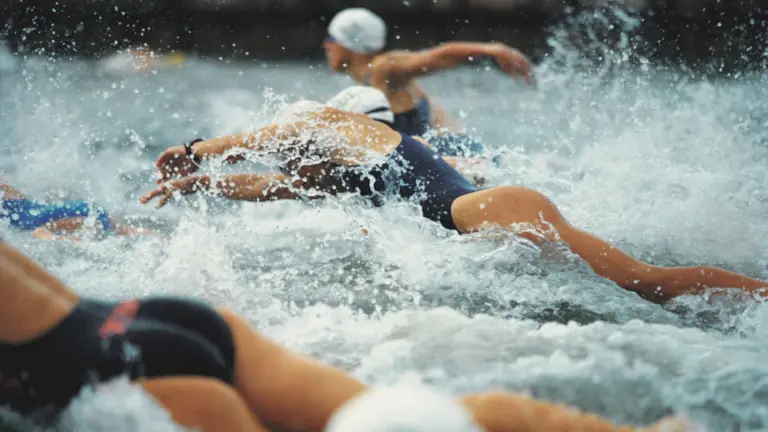
6. Kick Drills for Triathletes
Picture this: you’re in the midst of a grueling triathlon swim leg, and your legs are your mighty steeds propelling you forward. That’s where kicking drills come to the rescue! By incorporating specific kickboard drills into your training, you’ll conquer the water with ease during your triathlon:
Four Kickboard Drills for a Well-Rounded Workout
Kickboard Frenzy
Hold that kickboard out in front of you and kick away! Focus on maintaining a strong kick rhythm as if your life depends on it. This drill targets your quadriceps, hamstrings, and calves, building leg endurance for those long triathlon swims.
Single-Leg Symphony
Channel your inner ballet dancer as you kick one leg at a time, holding the kickboard with both hands for support. Don’t forget to switch legs! This drill hones your balance and strengthens individual leg muscles, perfect for uneven triathlon terrain.
Vertical Kick Challenge
Say goodbye to the pool floor as you tread water vertically while fiercely flutter-kicking. No arm support here – it’s all about your legs! This drill engages your entire leg muscle group, prepping you for the diverse challenges of open-water swimming.
Kick Tempo Delight
Kick with the kickboard while focusing on rapid yet controlled kicks. Think hummingbird wings – that’s your target tempo. This drill elevates your kick’s speed and power, essential for quick accelerations during triathlon sprints.
Benefits of the Drill
- Leg Muscle Strengthening: Triathlons demand endurance from your legs, and these drills are here to deliver. You’ll be primed to tackle the swim leg with unwavering strength by engaging your leg muscles through kickboard workouts.
- Improved Swim Endurance: Picture yourself gliding effortlessly through the water, mile after mile. These kick drills build your leg stamina, ensuring you’ve got that extra oomph for those lengthy triathlon swims.
Looking for a top-notch kickboard to supercharge your kicking drills? We’ve got you covered! Check out our top recommended kickboard, the Speedo Training Kickboard, designed to optimize your training sessions and take your kicks to legendary heights. 🚀
Proper Freestyle Kicking Technique
It’s time to perfect the crown jewel of swimming: the freestyle kick. Mastering this kick is like unlocking a secret portal to speed and efficiency in the water. Let’s dive into the key points that’ll help you improve your kick:
Starting the Kick from the Core and Hips
Forget about just flapping those feet – a powerful freestyle kick begins with your core and hips! Here’s the drill:
- Engage Your Core: Begin by engaging your core muscles to create a stable foundation for the kick.
- Hip Initiation: Initiate the kick from your hips, not just your knees or ankles. Imagine your hips leading the movement.
- Fluid and Continuous: Ensure that your kick is fluid and continuous, like a well-choreographed dance.
Kicking Narrowly with Slightly Bent Knees
Picture a streamlined torpedo zooming through the water – that’s you! Embrace these points for a narrow and efficient freestyle kick:
- Legs Close Together: Keep your legs relatively close together during the kick, minimizing space between them.
- Avoid Excessive Knee Bend: Focus on a slight knee bend rather than exaggerated bending, as it creates drag and slows you down.
- Flutter Those Toes: Keep your legs straight and toes pointed to maximize propulsion.
Kicking Near the Surface for Optimal Speed
Here’s a little secret to speed demon status: stay close to the water’s surface during your kick. Here’s how:
- Stay Close to the Surface: Keep your kick relatively shallow, just below the water’s surface.
- Avoid Kicking Too Deep: Kicking too deep creates unnecessary resistance.
- Glide with Minimal Disturbance: Aim to glide through the water with minimal disturbance, akin to a stealthy sea creature.
Benefits of Proper Freestyle Kicking
- Efficient and Speedy Swimming: Mastering the freestyle kick will transform you into a sleek and speedy swimmer. You’ll glide through the water with grace and leave the competition in your wake.
- Conservation of Energy: An efficient kick means less energy expended on each stroke, saving your precious fuel for the other legs of the triathlon.
How to Incorporate Kicking Drills in Training
Congratulations, fellow swimmers! You’ve unlocked the secrets to unleashing the true power of your kicks. Now, it’s time to weave these kicking drills into your swimming workouts and achieve new heights of aquatic prowess. Let’s dive into some tips on seamlessly incorporating them into your training routine:
Tips for Integrating Kicking Drills into Swimming Workouts
- Warm-Up with Kicks: Start your swim sessions with a few minutes of gentle flutter kicks or vertical kicking. This helps warm up your leg muscles and primes them for the rigorous kicking drills to come.
- Structured Kick Sets: Designate specific kick sets in your workout plan. For example, you can focus on kickboard drills one day, followed by freestyle flutter kicks the next. This ensures you’re dedicating quality time to refine each aspect of your kick technique.
- Balance is Key: While kicking drills are a powerful tool, don’t neglect your full-stroke practice. To strike a perfect balance, alternate kick-focused drills with sets that involve full-stroke swimming. This way, you hone your overall swim technique while reinforcing your newly acquired kicking skills.
Structuring a Balanced Kick drill Training Routine
Variety is the spice of life – and of swimming workouts! Here’s a sample training routine with a kick-focused flair:
- Warm-Up (5-10 minutes): Gentle flutter kicks and vertical kicking to get those leg muscles firing.
- Kickboard Drills (15 minutes): Hold onto that kickboard and conquer various drills, like the Single-Leg Symphony and Vertical Kick Challenge.
- Freestyle Kick Sets (10 minutes): Focus on narrow and efficient flutter kicks to complement your freestyle technique.
- Full-Stroke Practice (20 minutes): Swim a few sets of your favorite strokes, incorporating your newly refined kick technique.
- Kick Tempo Delight (5 minutes): Wrap up with a high-tempo kick set to infuse some speed and power into your kick.
Remember, balance is the key to unlocking your true potential. By blending kicking drills with full-stroke practice, you’ll forge a harmonious swim technique that propels you to victory in any pool or open water race.
Check out our Swimming Workouts & Training category to discover more effective drills and exercises that will take your swimming skills to the next level. Whether you’re a beginner or a seasoned swimmer, these training resources will help you achieve your aquatic goals and excel in the pool. 🏊♂️💪
FAQs
Conclusion
In conclusion, kicking drills are the secret ingredient to elevating your swimming game from good to great. These drills play a crucial role in improving your leg strength, balance, and overall technique, leading to enhanced speed and efficiency in the water.
Throughout this article, we’ve explored a variety of kicking drills for swimmers, from single-leg free kicking to vertical free kicking, mail-slot kick drills, ankle rotations, flutter kick drills, kick drills for triathletes, and proper freestyle kicking technique. Each drill serves a specific purpose in honing your kick and propelling you to aquatic excellence.
Remember, practice makes perfect and consistent dedication to these drills will yield significant improvements in your swimming performance. So, embrace the challenges, relish in the victories, and keep refining your kicking skills for better results. Happy swimming!