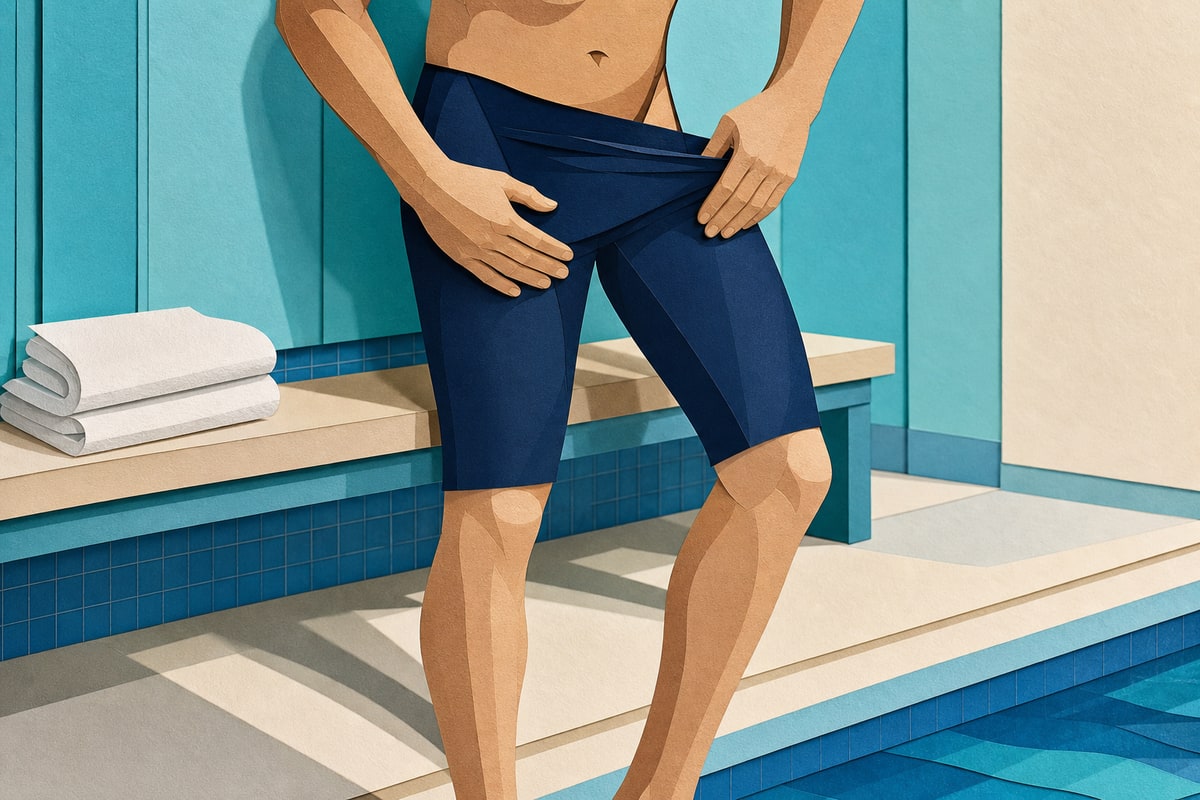
Putting on a tech suit should feel slow and deliberate—not like a strength test. The safest method is to start completely dry, protect the fabric from nails and jewelry, and move the suit upward a few inches at a time using the pads of the fingers near reinforced seams.
Do not yank the waistband or shoulder straps. Get both legs fully seated before working the suit over the hips, then adjust the torso and straps last.
Before you start
Set yourself up before opening the dressing-room door or meet-bathroom stall.
- Read the size chart and fitting instructions for the exact model.
- Check the seller’s try-on and return rules before removing tags or getting the suit wet.
- Dry your body and the suit completely. Damp skin makes compressive fabric harder to move.
- Trim and file rough nails. Remove rings, watches, bracelets, and anything else that can snag fabric.
- Use a clean, dry floor or towel so the suit never drags across a rough surface.
- Leave more time than you would for a practice suit, especially on the first attempt.
Official guidance from FINIS, Speedo, and arena all emphasizes dry skin, finger pads instead of nails, turned-up leg grippers, and pulling near stronger seams or lined areas. Those precautions are worth following even when a particular suit feels relatively easy to put on.
How to put on a women’s tech suit or kneeskin
1. Turn up the leg grippers
If the suit has silicone grippers at the leg openings, fold them outward before stepping in. This keeps the sticky surface from catching against the skin while the legs are still being positioned.
Do not stretch the opening wider than necessary.
2. Insert one foot at a time
Guide one foot through the first opening, then the other. Keep the fabric clear of toenails and avoid standing on the suit.
If a foot catches, stop and reset it. Forcing the fabric over the heel is faster only until something tears.
3. Work each leg to the knee
Move the fabric upward in small sections, alternating sides. Use the flat pads of the fingers and place your hands close to seams or lined areas when the manufacturer’s construction allows it.
Bring both leg openings to the intended height and check that the inseams are aligned rather than twisted.
4. Seat the legs before crossing the hips
Continue working the fabric up the thighs until the suit is fully seated at the crotch. This is the most important positioning step: extra fabric left below the hips makes the next stage much harder and can leave folds or air pockets.
Do not compensate by hauling upward from the top edge.
5. Ease the suit over the hips
Alternate small pulls from one side to the other. Grip reinforced areas, seams, or double-layer fabric—not a thin center panel. Keep checking that the suit stays even across the front and back.
If it will not move without extreme force, stop. Recheck the leg position and the model’s size chart instead of treating more force as the solution.
6. Set the torso
Once the suit is secure over the hips, work the side panels upward toward the chest. Smooth major folds as you go, but do not pinch at the fabric with fingernails.
The hips and crotch should already be correctly positioned before you move to the straps.
7. Put on the straps last
Bend one arm and guide one strap over the shoulder, then repeat on the other side. Do not use a strap as a handle for lifting the rest of the suit.
A parent or teammate can help if the model is difficult to manage, but the swimmer should direct the process. The helper should use finger pads and support reinforced areas rather than pulling hard on a strap.
8. Finish the fit check
Turn the leg grippers back down and smooth obvious folds. Check that the center and side seams are aligned, the suit is fully seated, and the coverage remains legal when the swimmer bends and moves.
How to put on a tech-suit jammer
The first steps are similar, but there is no torso or strap stage.
- Fold out the leg grippers and, if the manufacturer’s instructions say to, turn the waistband outward.
- Insert one foot at a time without dragging the suit over nails or a rough floor.
- Work each leg evenly to the knee, keeping the inseams aligned.
- Move the fabric up both thighs until the jammer is fully seated at the crotch.
- Ease the suit over the hips using finger pads near strong seams.
- Position the waistband without pulling from the drawcord.
- Untwist and tie the drawcord, then restore any folded grippers or waistband.
The jammer should sit smoothly without a low crotch, rolled leg openings, a twisted seam, or a gap at the back of the waist.
How do you know the tech suit fits?
A tech suit is supposed to feel compressive. That does not mean every uncomfortable sensation is evidence of a fast fit.
Before race day, confirm that the swimmer can:
- breathe normally;
- raise and rotate the shoulders;
- bend into a legal start position;
- squat and bring each knee upward;
- move through the full kick for every planned stroke; and
- maintain secure, legal coverage.
The fabric should sit close to the body with no major folds, gaps, or air pockets. Stop and reassess the size if there is sharp pain, numbness, severe breathing restriction, blocked movement, transparent stress, or obvious seam distortion.
If the fit is still uncertain, compare the exact measurements with the manufacturer’s current chart. The tech-suit buyer guide explains how rules, events, compression, and body proportions affect the choice.
What not to do
- Do not put on a tech suit while your body or the fabric is wet.
- Do not pull with fingernails or pinch a small point of fabric.
- Do not wear jewelry while dressing.
- Do not yank the waistband, drawcord, or shoulder straps.
- Do not twist the legs and hope they straighten after the hips are in place.
- Do not force a suit that shows severe stress at a seam or panel.
- Do not test a new suit in the pool until you are certain you are keeping it.
- Do not assume that sizing down automatically creates a better race fit.
A calmer meet-day routine
Do the first dry fitting before the championship session, while the return policy still allows it. A first attempt in a crowded locker room adds pressure exactly when the fabric needs patience.
On race day:
- Warm up in a practice suit unless the coach or meet plan says otherwise.
- Dry off completely, including behind the knees and around the hips.
- Put the tech suit on early enough that rushing is unnecessary.
- Recheck the event, heat, lane, cap, and competition goggles after dressing.
- Keep a practice suit and dry towel in the swim bag as backups.
Families can use the swim-meet packing list and first-meet guide to organize the rest of the session without making the tech suit the center of the day.
Removing and caring for the suit
Reverse the process patiently. Roll or ease the suit downward in sections; do not pull it off by one strap or the waistband.
After racing, follow the exact care label. Current arena and TYR instructions support the core routine:
- rinse promptly in clean, cold water;
- do not machine wash, tumble dry, bleach, iron, or dry clean;
- do not wring or twist the fabric;
- lay it flat or air-dry it away from direct heat and sun; and
- do not leave it wet in a closed bag.
Keep it away from Velcro, rough deck surfaces, and sharp objects. Reserve a delicate championship suit for racing rather than routine practice if you want the fabric and water-repellent finish to last longer.
Frequently asked questions
Can someone help pull up a tech suit?
Yes, especially with kneeskin straps, but the helper needs the same careful technique. The swimmer should say where support is needed, and the helper should hold strong seams or lined areas with finger pads—not yank a strap or thin panel.
Should you wear gloves to put on a tech suit?
Some arena fitting guidance suggests cotton gloves as an extra precaution. They are optional, not a substitute for dry skin, smooth nails, and careful hand placement. Follow the exact manufacturer’s instructions if gloves make it harder to control the fabric.
How long should it take?
There is no universal time. Model, compression, body proportions, and experience all matter. Plan for a first fitting to take much longer than putting on a practice suit, then start early enough on meet day that the clock never decides how hard you pull.
What if the suit will not go over the hips?
Stop pulling from the waistband. Check that both legs are fully worked up and the crotch is correctly seated. If the suit still requires extreme force or the seams visibly distort, remove it carefully and recheck the size chart.
What should you do if the fabric or a seam tears?
Stop stretching the area. Photograph the damage and contact the manufacturer or retailer before attempting a repair, especially if the suit may be covered by a warranty or return policy.
Bottom line
The safest way to put on a tech suit is also the least dramatic: dry everything, remove snag risks, move the fabric in small sections, seat the legs before the hips, and leave the straps for last. A correct fit should be compressive and smooth while still allowing breathing, movement, and legal coverage.
When the suit demands extreme force or causes sharp pain, the answer is not to pull harder. Recheck the positioning, the size, and the instructions for that exact model.
A note from Nikki
What I looked at
I compared current fitting and care instructions from FINIS, Speedo, arena, and TYR, separating the shared steps from details that depend on the exact suit.
What can vary
Construction, grippers, seams, sizing, and warranty terms vary by model. Follow the label and current instructions for the exact suit if they differ from this general guide.